|
|
A well-kept ’69 Chevy C10 is easy to appreciate. The long sweeping body lines, the chrome trim, and a stance that still turns heads fifty years on. Some owners keep every detail as it was on day one, chasing factory-correct parts down to the last bolt. Others make changes here and there for style, comfort, drivability, or most importantly… performance.
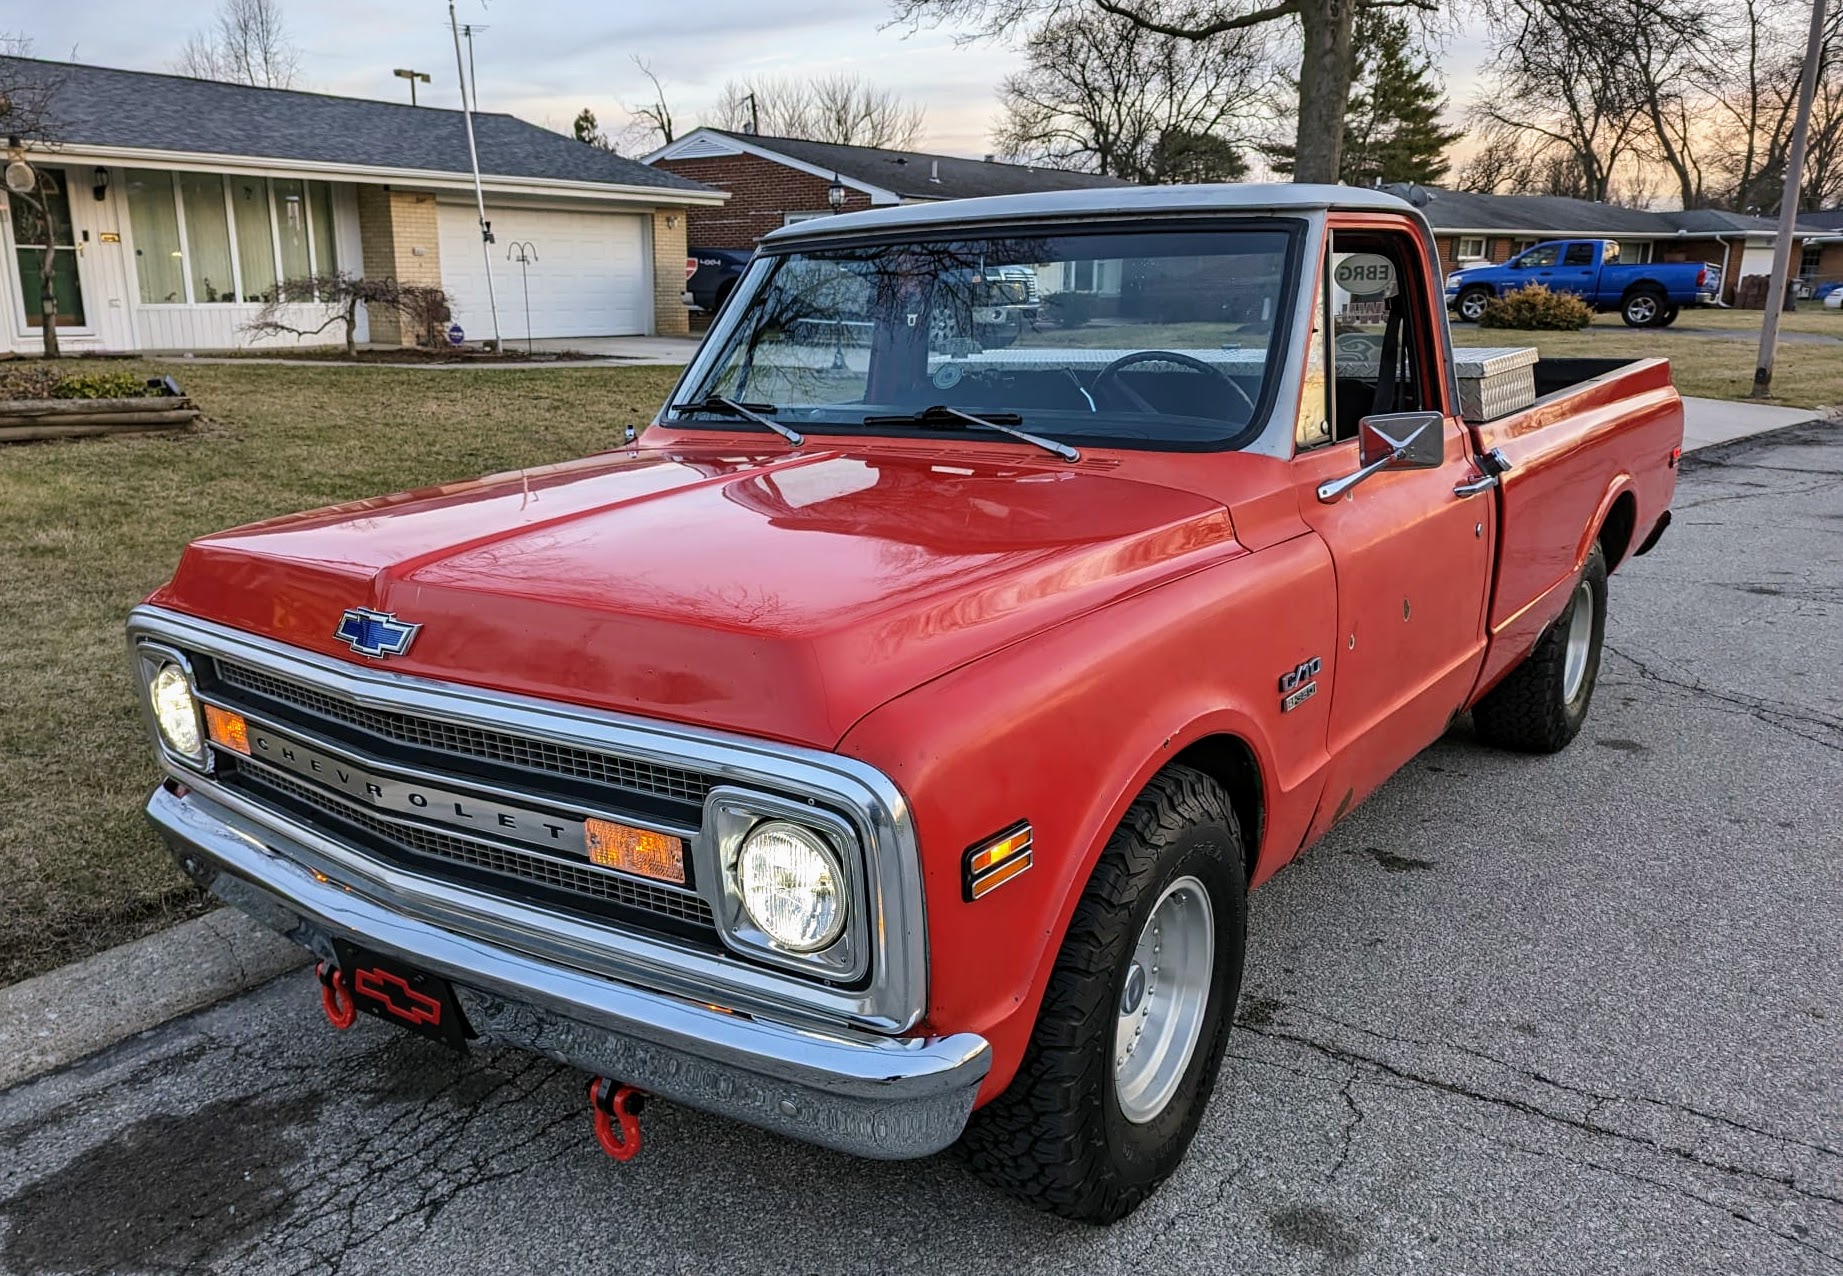
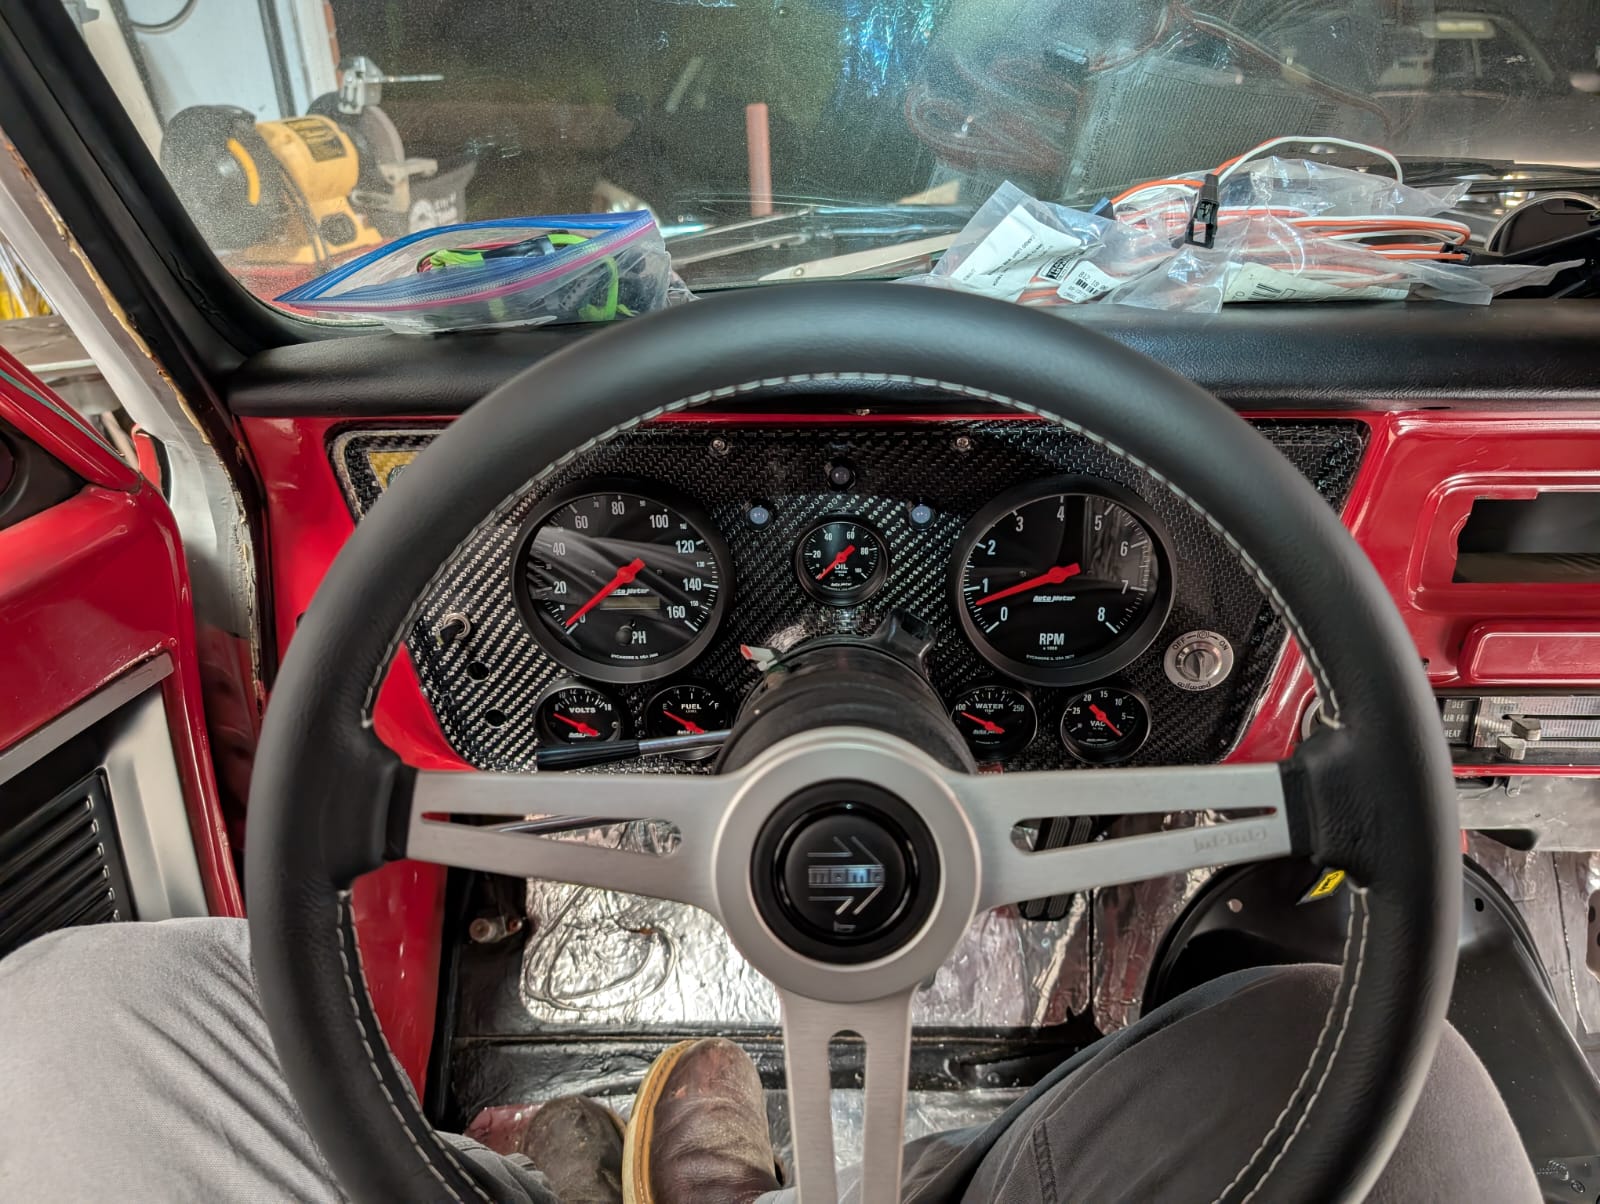
For Matt Clegg, SOLIDWORKS Community and User Advocacy Manager, a smaller 15-inch steering wheel was one of those changes. The original 17-inch wheel offered plenty of leverage, but it also felt oversized and slow to respond. The new wheel gave the steering a quicker feel, a more modern look, and increased the cab’s interior space, but it also obstructed the driver’s view of several important gauges.
For anyone unfamiliar, the gauges on a truck’s dashboard are your real-time readouts on how the engine and systems are performing. Oil pressure, coolant temperature, fuel level, engine RPM, and speed all live there. Rather than craning his neck to view his gauges and living with the obstructed view, Matt decided to build a new dash panel, custom-designed for his optimal viewing needs.
He sourced the blank from Munssey Speed(https://munsseyspeed.com/), a Texas company that makes carbon fiber panels for these classic trucks. It had the right shape and edge profile, but no cutouts, leaving the layout completely up to him.
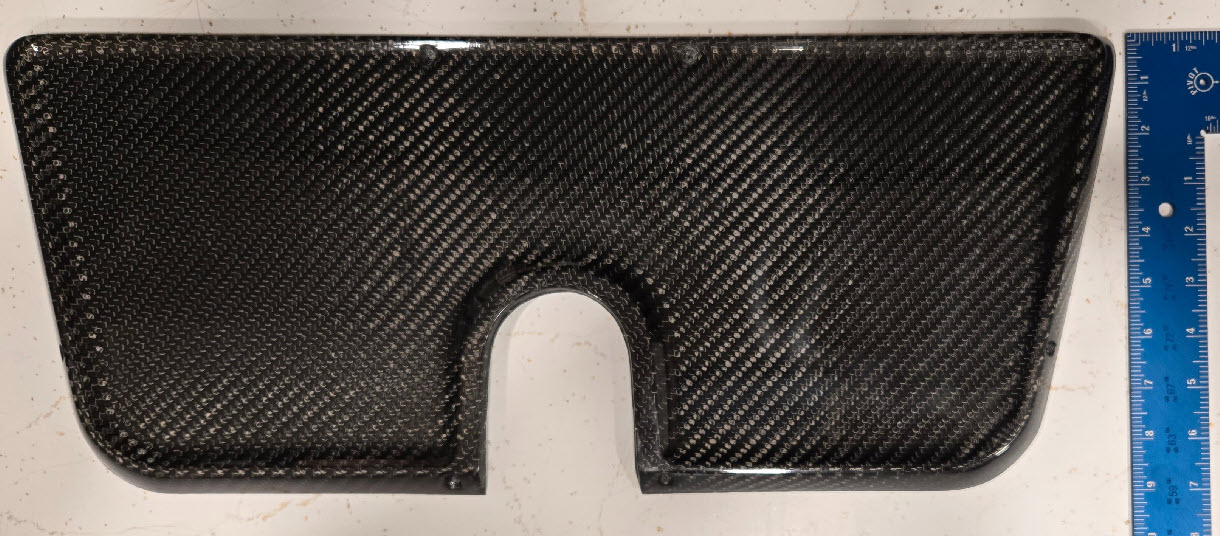
Traditionally, this kind of project involves pulling out calipers and compasses, measuring the old panel piece by piece, and then transferring those measurements to the new one. It works, but it’s slow, and even a small mistake can be costly. With so many holes to cut, a simple tolerance stack-up from hand-copied dimensions could easily send this expensive carbon fiber blank to the scrap pile.
By first using SOLIDWORKS for Makers, Matt knew he could eliminate that risk by perfecting the design before ever touching a tool.
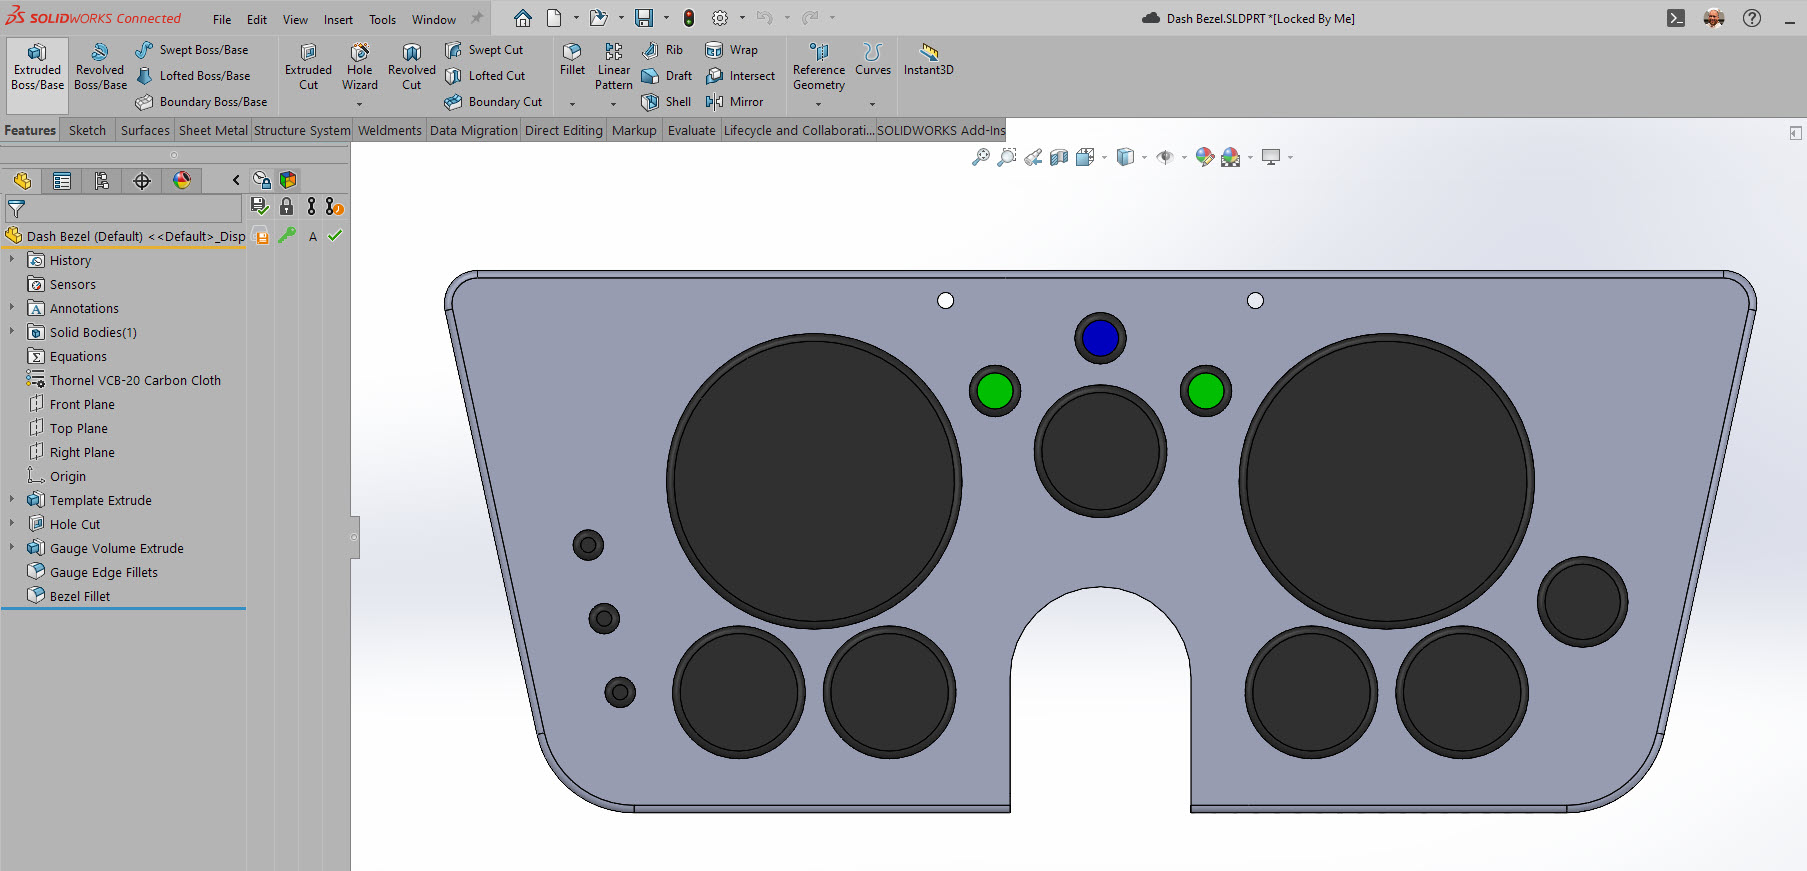
Matt opened SOLIDWORKS for Makers and used the Sketch Picture tool to import a photo of the carbon fiber blank into the software. By including a ruler in the photo, he could accurately scale the image. From there, he sketched the gauge holes, indicator lights, and switches directly over the picture.
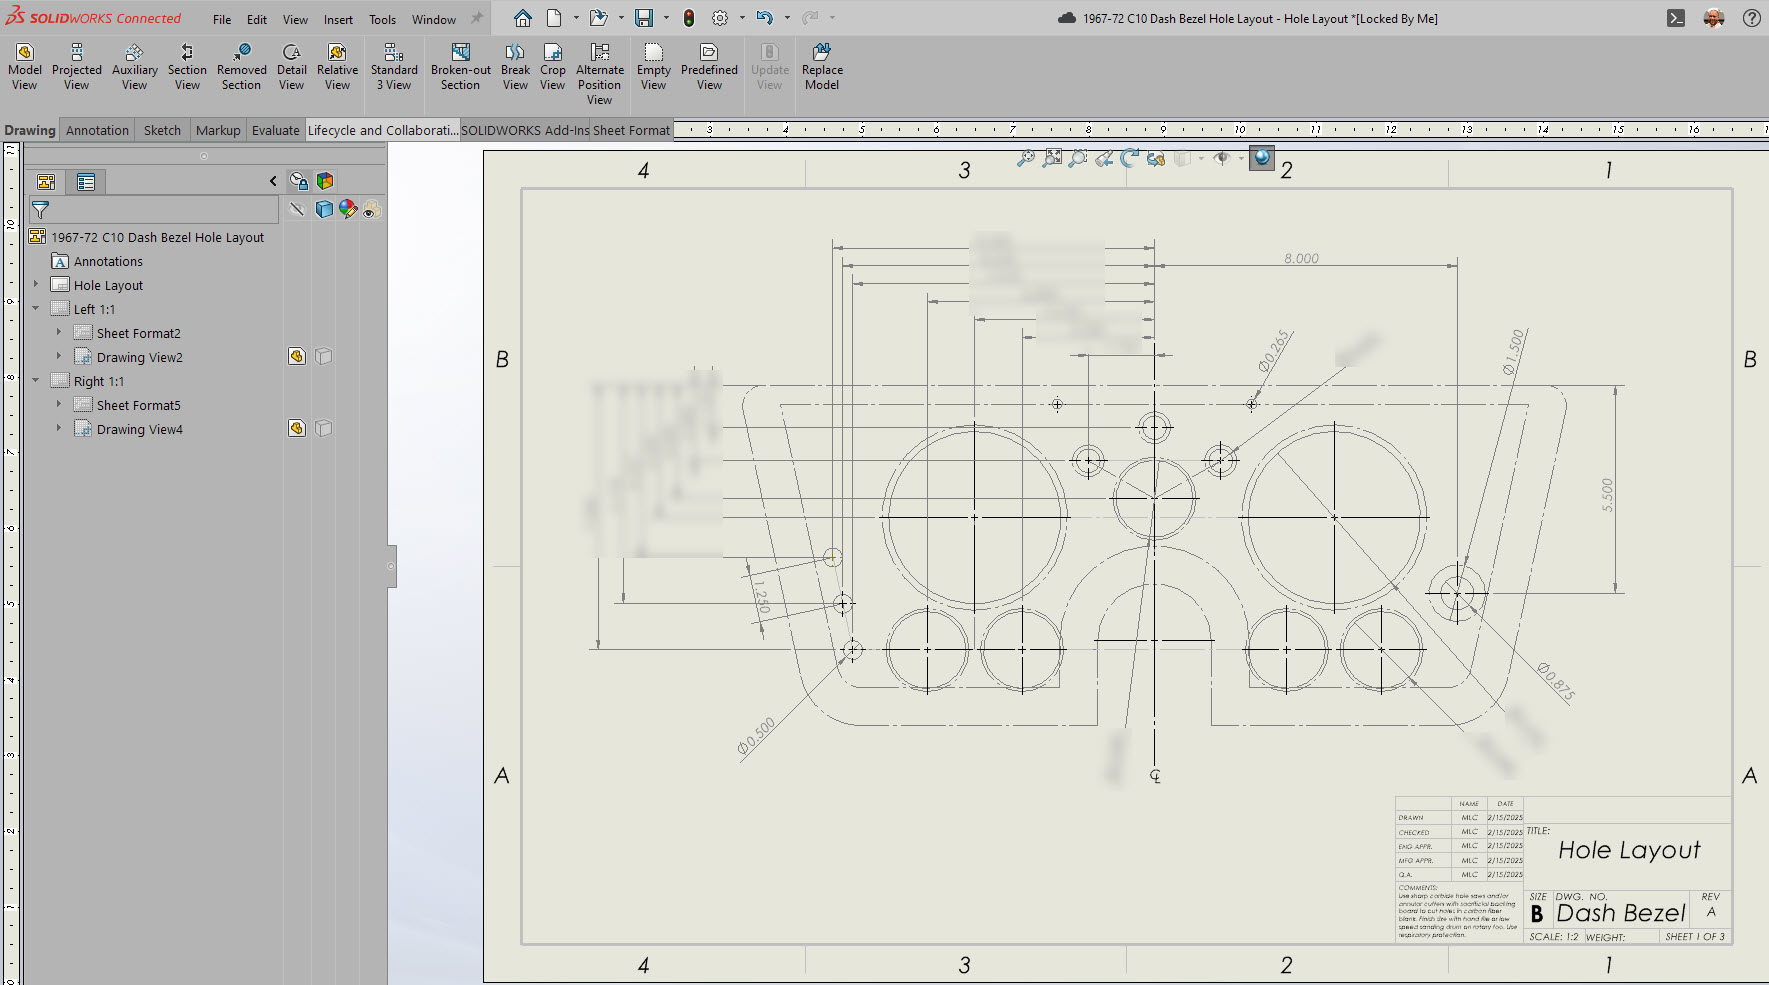
“It’s far easier to drag elements around on-screen than it is to move a hole in real life,” Matt says. “With CAD, you can try several different layouts without wasting a single piece of material. When you have a part like this dash blank with multiple curves and edge offsets, printing out a 1:1 check template is by far the fastest way to check your ideas out in the shop before committing with a five-inch hole saw.”
When you’re modifying or recreating parts for a car or truck, accurate measurements are everything. The Sketch Picture feature in SOLIDWORKS for Makers makes that accuracy easier to achieve by enabling users to:
1. Scale from a photo – Put a ruler or another object with known dimensions in the shot, and the software can lock the image to scale.
2. Work from the actual part – You’re sketching directly over the image of your dash panel, bracket, or body panel.
3. Catch problems early – Spot conflicts before you cut, like a gauge needle hidden behind a turn signal lever.
4. Faster iterations – Move things around on-screen without re-measuring or starting over. CAD allows you to go beyond just making things that function; they can now follow your aesthetic preferences.
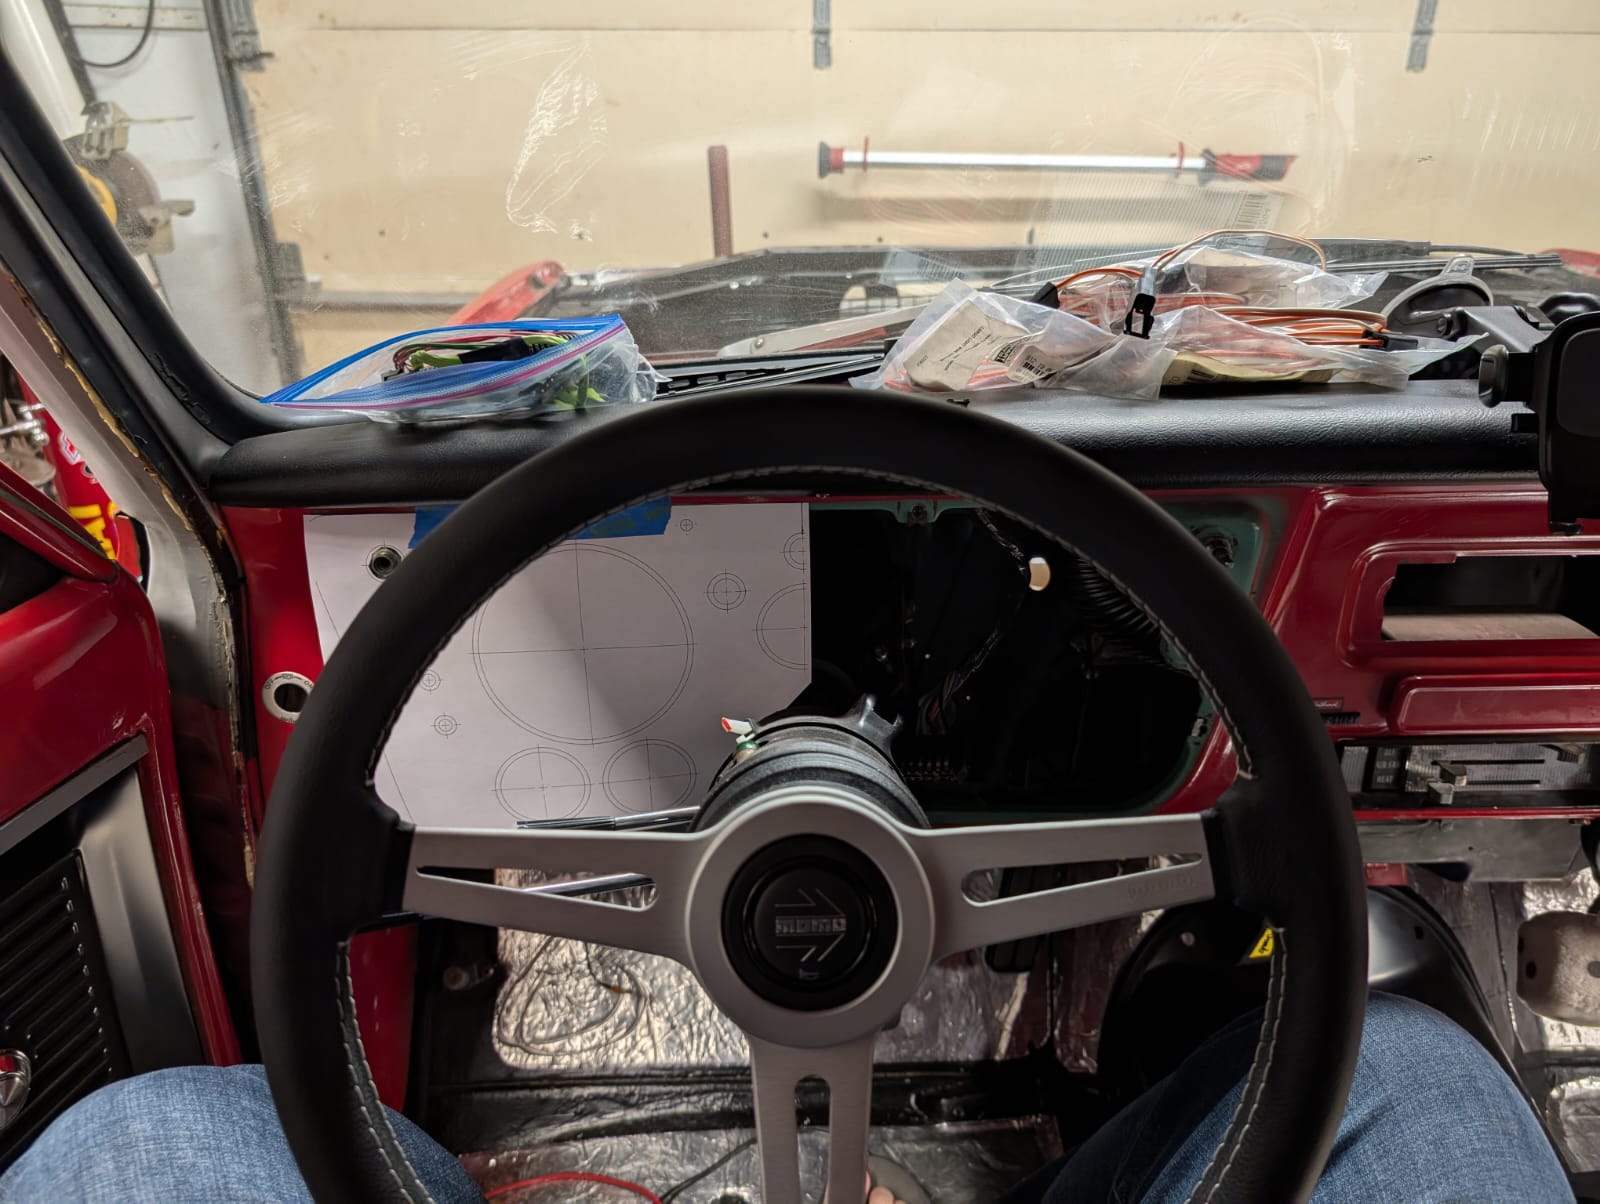
Once Matt had a layout he liked, he printed it full-size, cut it out, and taped it to the blank carbon fiber dash. It’s a good example of CAD working together with a simple paper template. From the driver’s seat, he could check sight lines in seconds and spot anything that might be hidden behind the wheel.
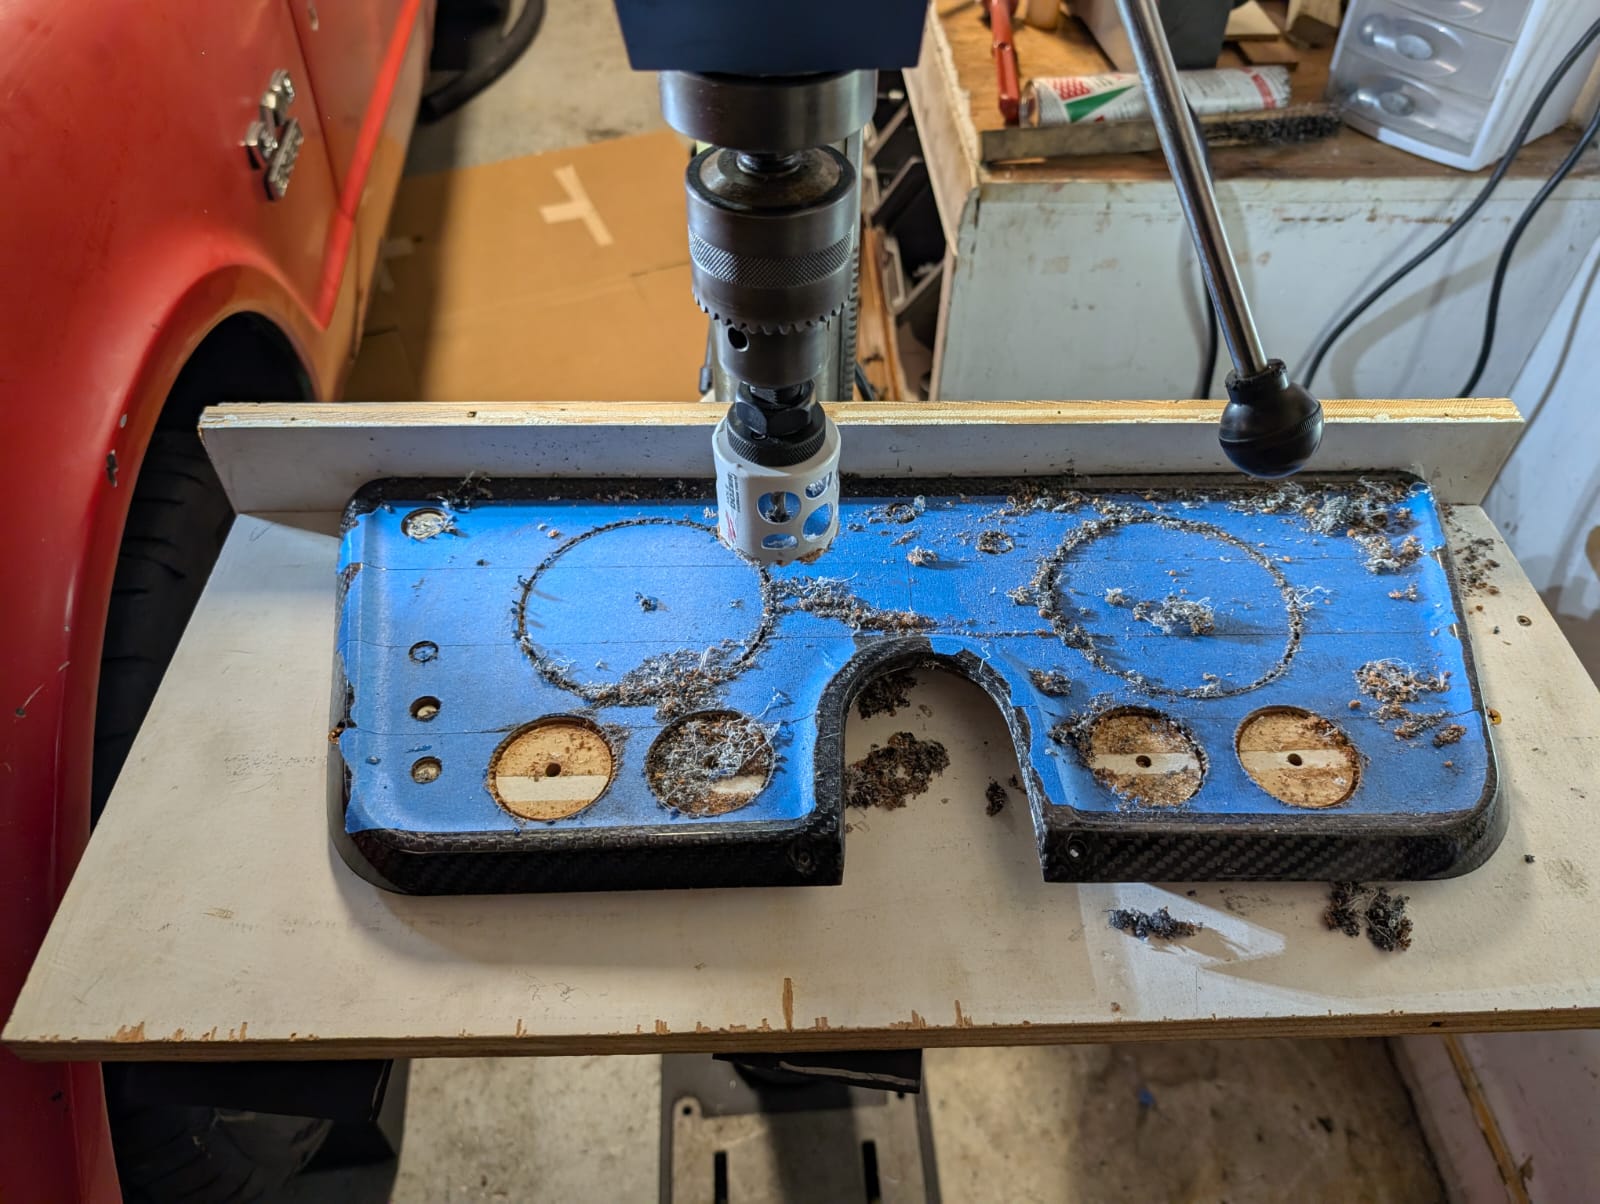
With the design finalized, Matt made a simple wooden jig to hold the panel steady and support it from underneath. Before drilling, he put on a respirator. “Carbon fiber dust is bad news for your lungs,” he says. A reminder to “wear a respirator any time you’re cutting or drilling carbon fiber.”
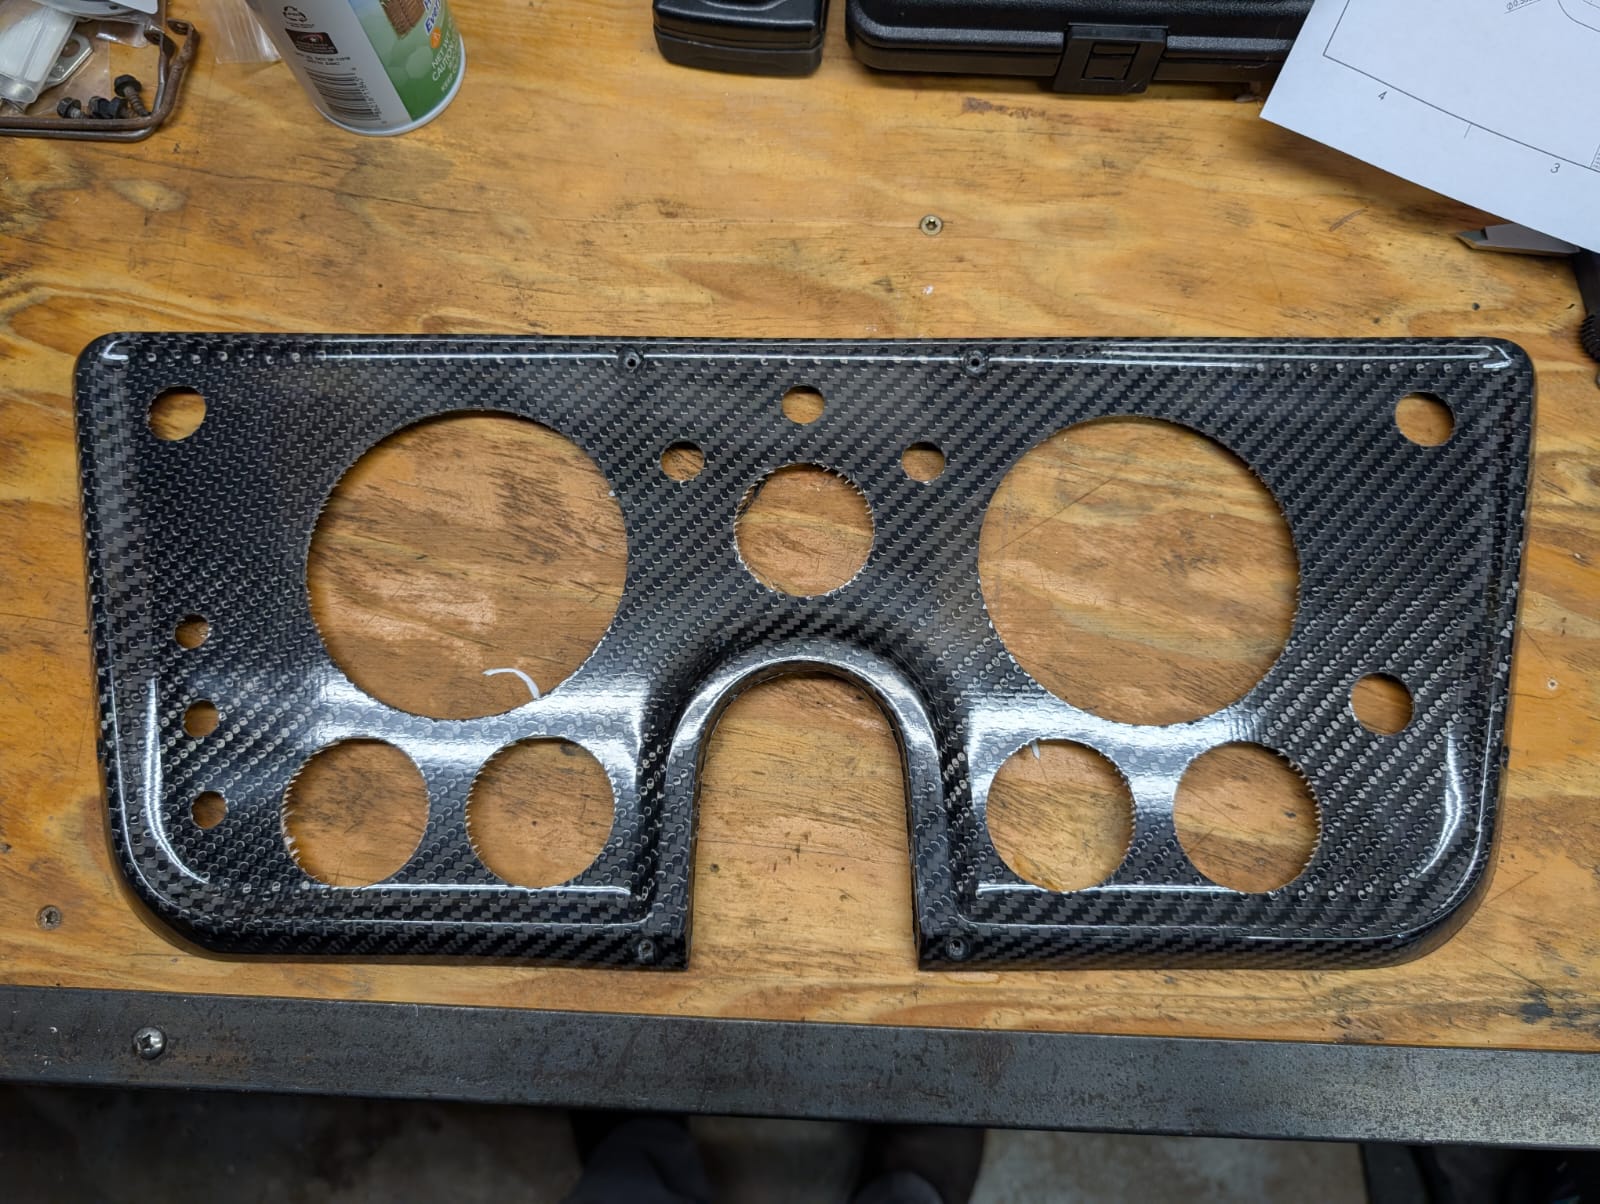
Each hole was drilled to size, erring slightly on the smaller side, with some hand-fitting with a file to keep the gauges snug. When the tape came off, it was glorious. The custom panel dropped into the dash like it belonged there from day one.
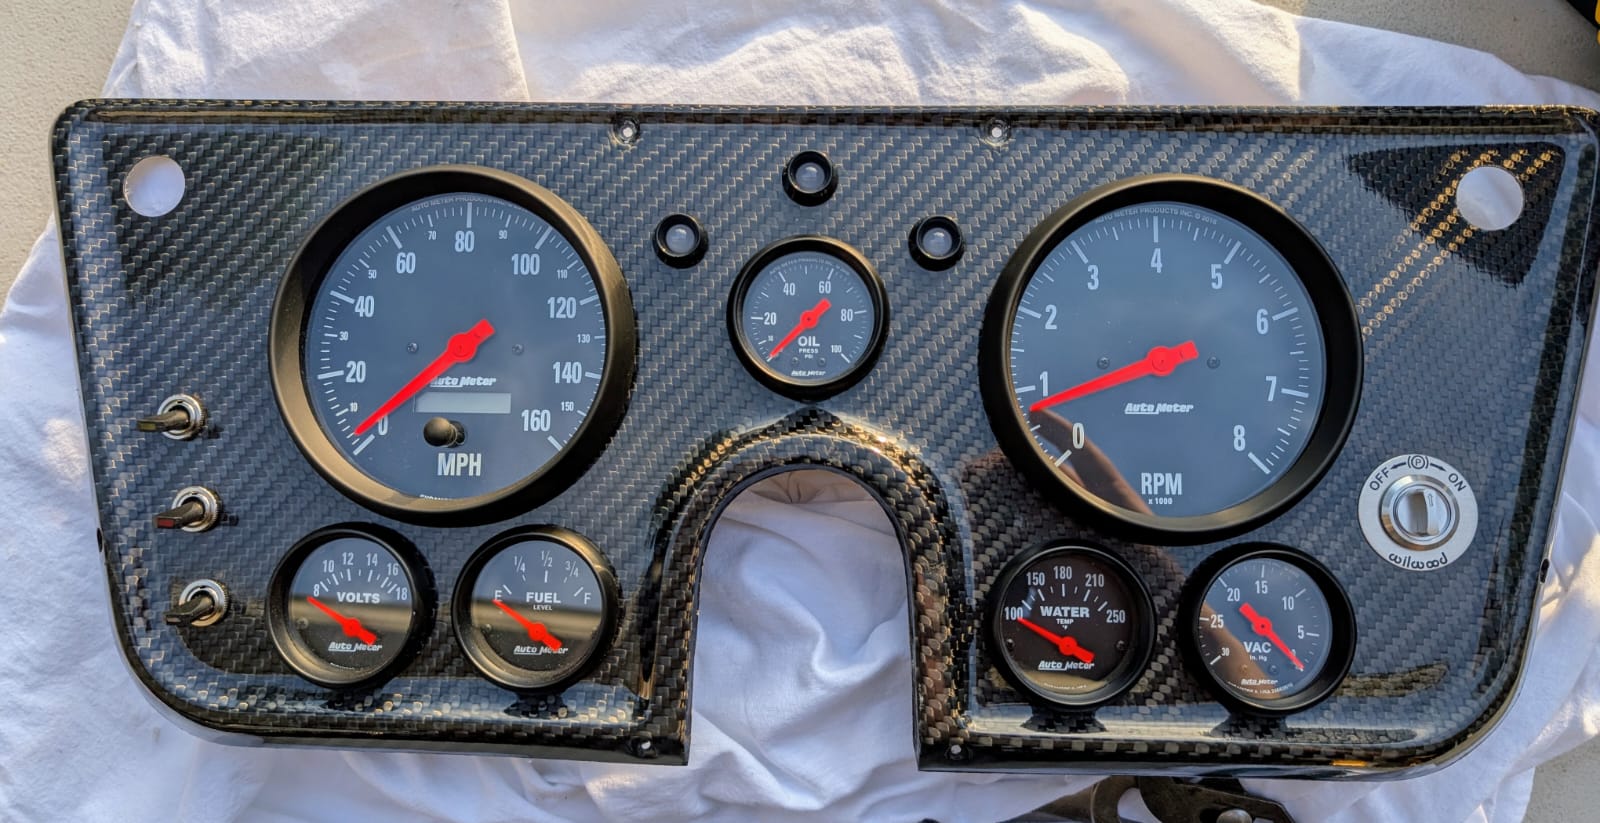
By doing the design work in CAD first, Matt avoided the expense of extra carbon fiber blanks and the time spent fixing small mistakes. More importantly, he ended up with a dashboard that gives him a clear view of every gauge and switch without shifting in his seat; all smiles and no compromises.
|
|
 |小黑屋|手机版|Archiver|机械荟萃山庄
( 辽ICP备16011317号-1 )
|小黑屋|手机版|Archiver|机械荟萃山庄
( 辽ICP备16011317号-1 )


 发表于 2025-11-9 09:37:49