|
|
How are First Release and Revision Processes Handled in SOLIDWORKS Design?
Sure, you can manage revision processes without Change apps. But thanks to them, you can record critical parameters—such as the source of the revision request, its benefits, who will check it, and who will approve it—making the process fully audited and controlled.
Before moving on to the Applied Project step, it is useful to know the Change Action and Collaborative Lifecycle interfaces and their working logic to understand the videos.
ENOVIA Change Execution
Change Execution has both web and Desktop applications. It is an application that allows you to manage the change processes within your company. With Change Execution, you can create the following activities:
New Investigation Request
New Change Request
New Change Action
Change Action (CA)
This is the main mechanism for managing change requests. If you need to request a change, you do this by creating a Change Action (CA) within the Change Execution application.
The interface and basic concepts you will encounter when creating a Change Action are as follows:
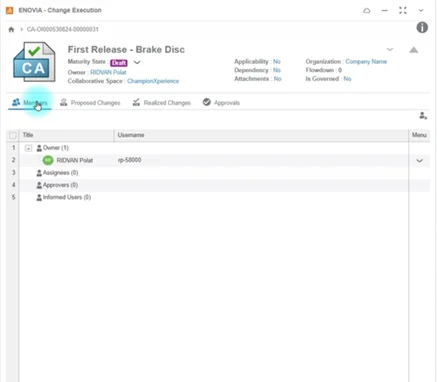
Members
From the Members tab, you can assign tasks to the person who will execute the process, add the person who will give approval or an approval route containing multiple people, and ensure that the people you want to be aware of the process are informed.
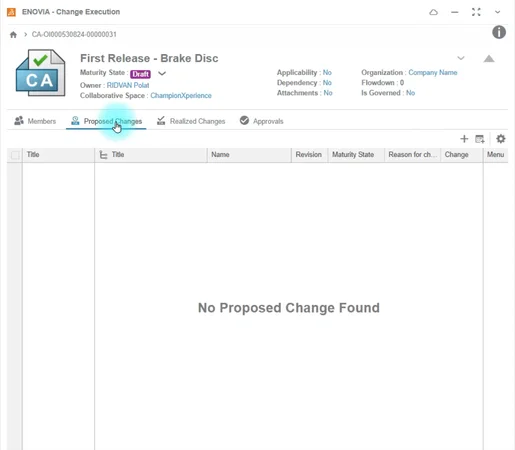
Proposed Changes
This is the backbone of the CA. Components to be changed are added to this area.
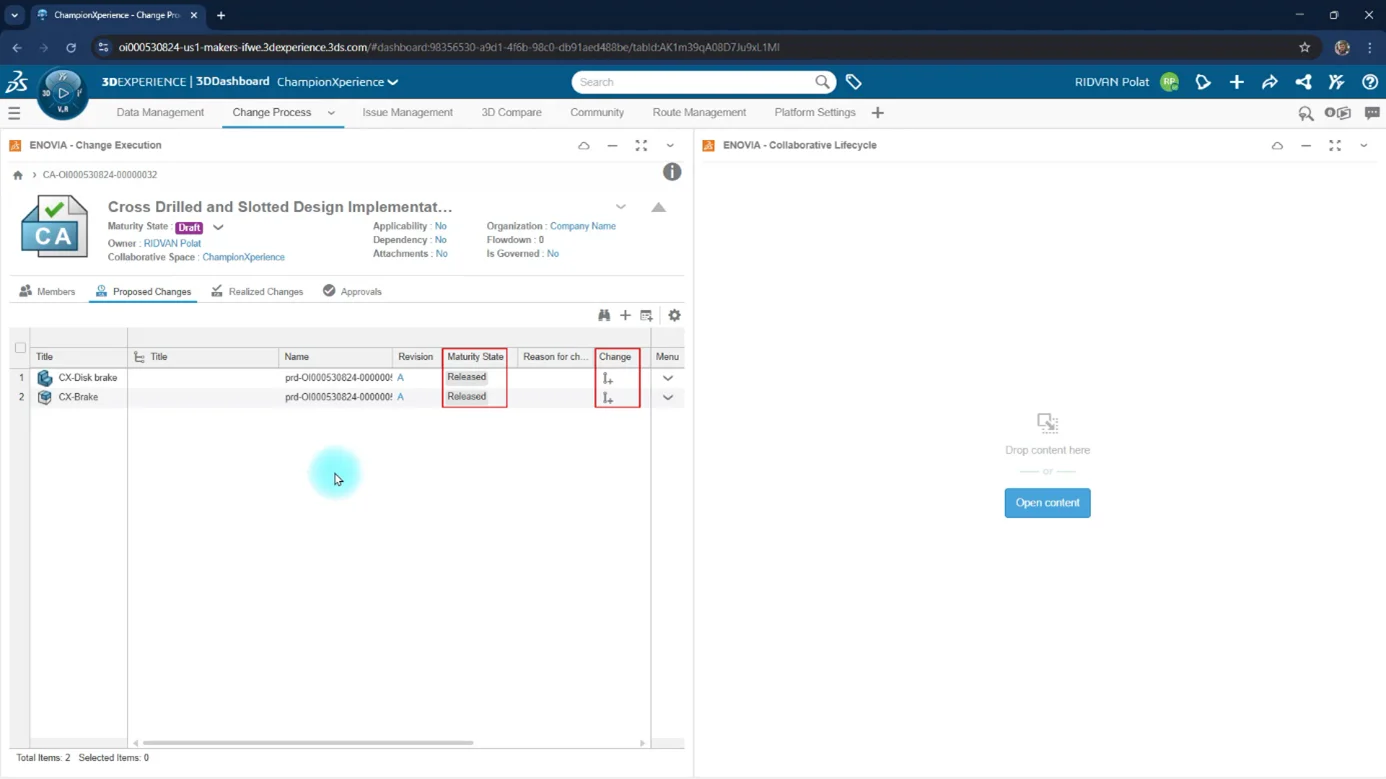
Change Execution is a smart application; based on the current maturity state of the component you add to the “Proposed Changes” area, it automatically shows you what the result of this operation will be (Target State).
First Release Scenario:
If your part’s maturity state is “In Work,” the Target State field automatically becomes “Released,” and a Lifecycle icon appears in the Change column.

Revision Scenario:
If your part is already in the “Released” state, a Revision icon appears in the Change column.
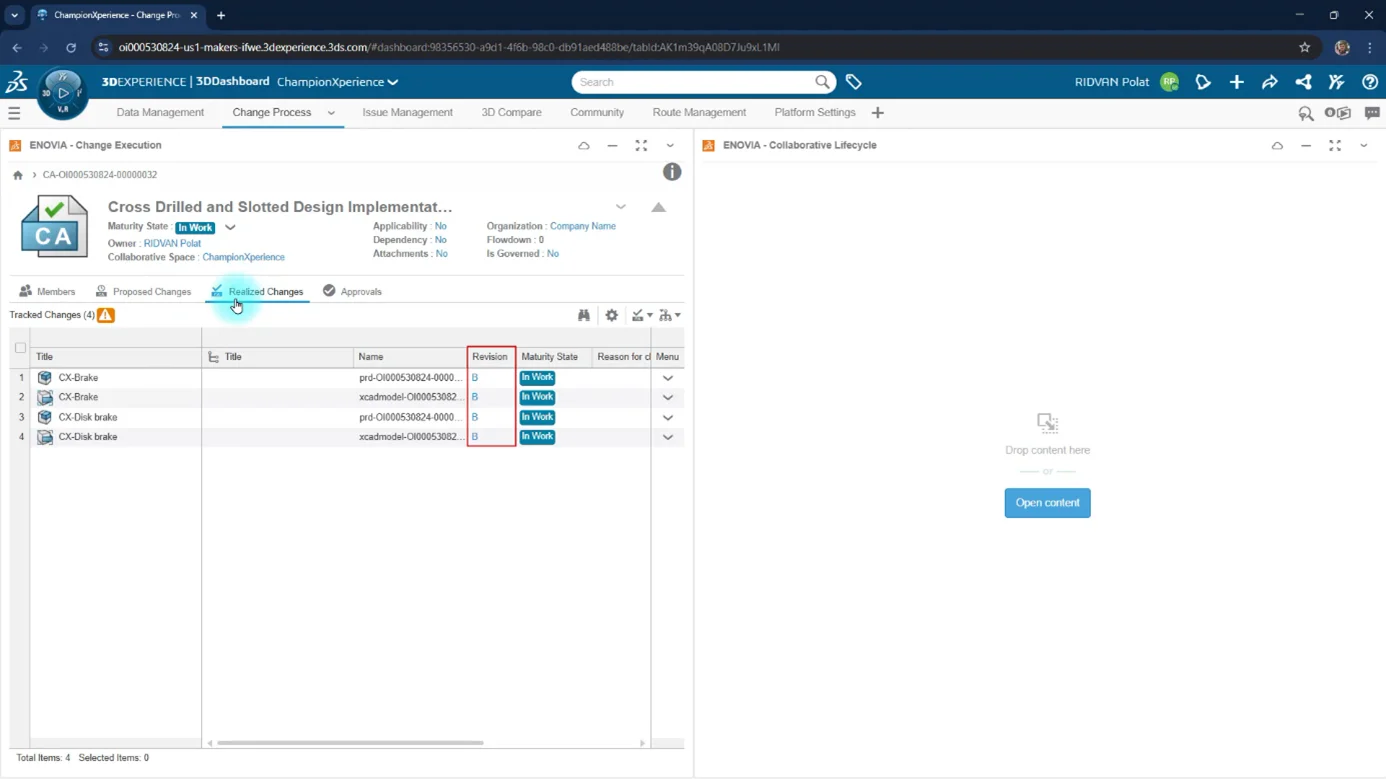
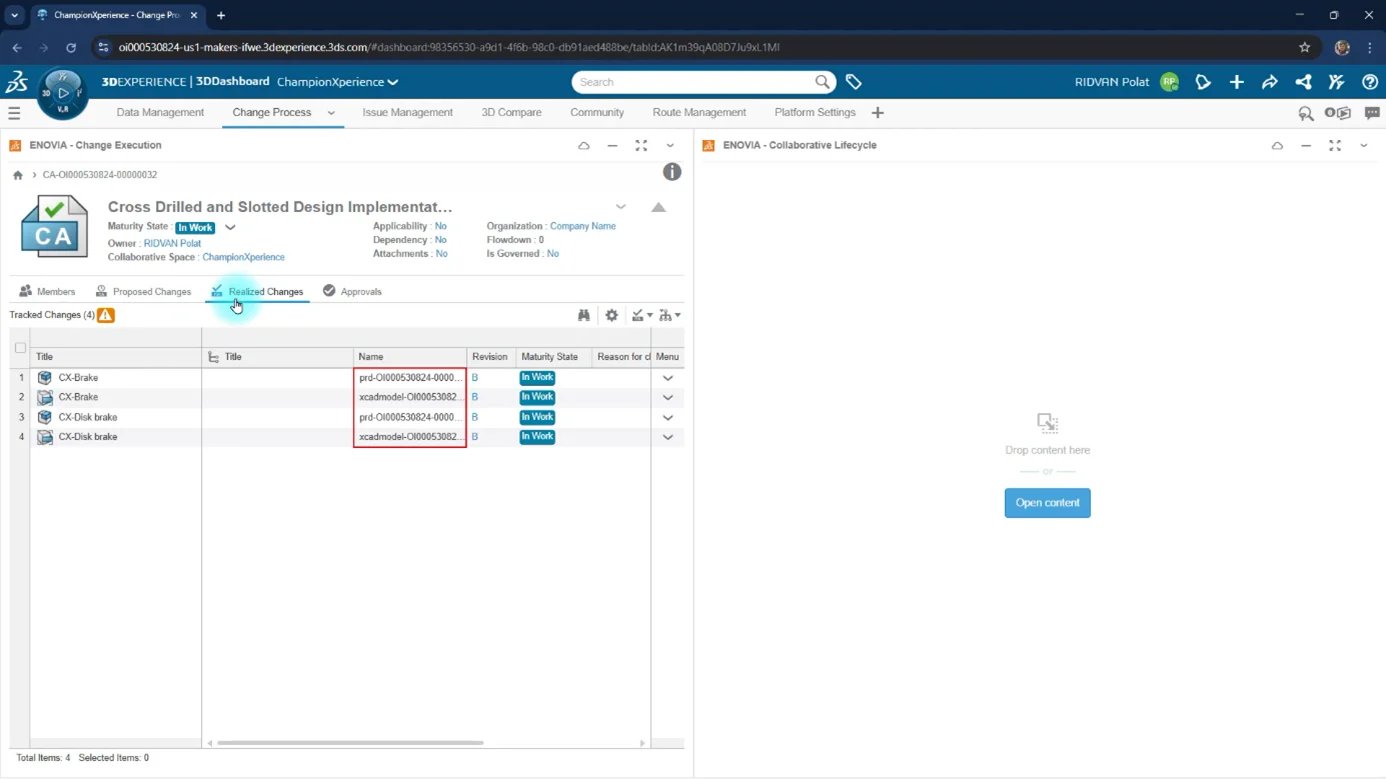
Realized Changes
When the CA is started, components added to the Proposed Change area appear in this area with their new states based on their target states.
Automatic Revision Creation: One of the biggest conveniences provided by the application is automation. If the part is in the “Released” state and you move the CA from the “Draft” stage to the “In Work” stage, a new revision of the part is automatically created and added to the Realized Changes tab. You do not need to manually create a new revision.
Automatic Maturity State Change:
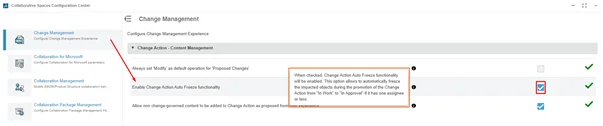
Similar automation exists for the First Release process as it does for revisions. Before submitting the CA for Approval (while in the In Work state), when the maturity state of the component in the “Proposed Changes” area is raised to the Frozen level, you can see that the Frozen components appear in the Realized Change area, and these components will become Released upon completion of the CA process. This way, you don’t need to manually change the Maturity states.

As a note, if you want to further automate the process, you can ensure the Frozen action happens automatically, as well. Thanks to the option shown in the image, when you select In Approval, you can ensure that components added to the Proposed Change area are automatically Frozen. But it’s worth remembering that this option only processes based on what you added to the Proposed Changes area. For operations like adding all components under an assembly, you need to use the Lifecycle.
Physical Product and CAD Representation:
When you examine the image carefully, you will notice that some file names say prd while others say xcadmodel.
prd (Physical Product): This is the identity of the product. It houses all the necessary information for the product on the platform.
xcadmodel (CAD Representation): Represents the SOLIDWORKS file.
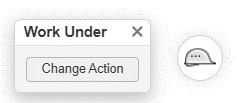
Work Under
This feature is the bridge between the CA you created and the CAD data. It has a hardhat-like icon.
When Work Under is active:
Every change you make is recorded in the background.
It provides retrospective traceability and guarantees that the process is carried out in a controlled manner within that change package.
How to Use Work Under
When you click on the hardhat icon, the Change Action button appears as shown in the picture above. When you click this button and select the relevant CA, the hardhat icon turns into the state shown with the red circle in the picture. When you click the icon again, you can also see the information of the CA it is connected to.
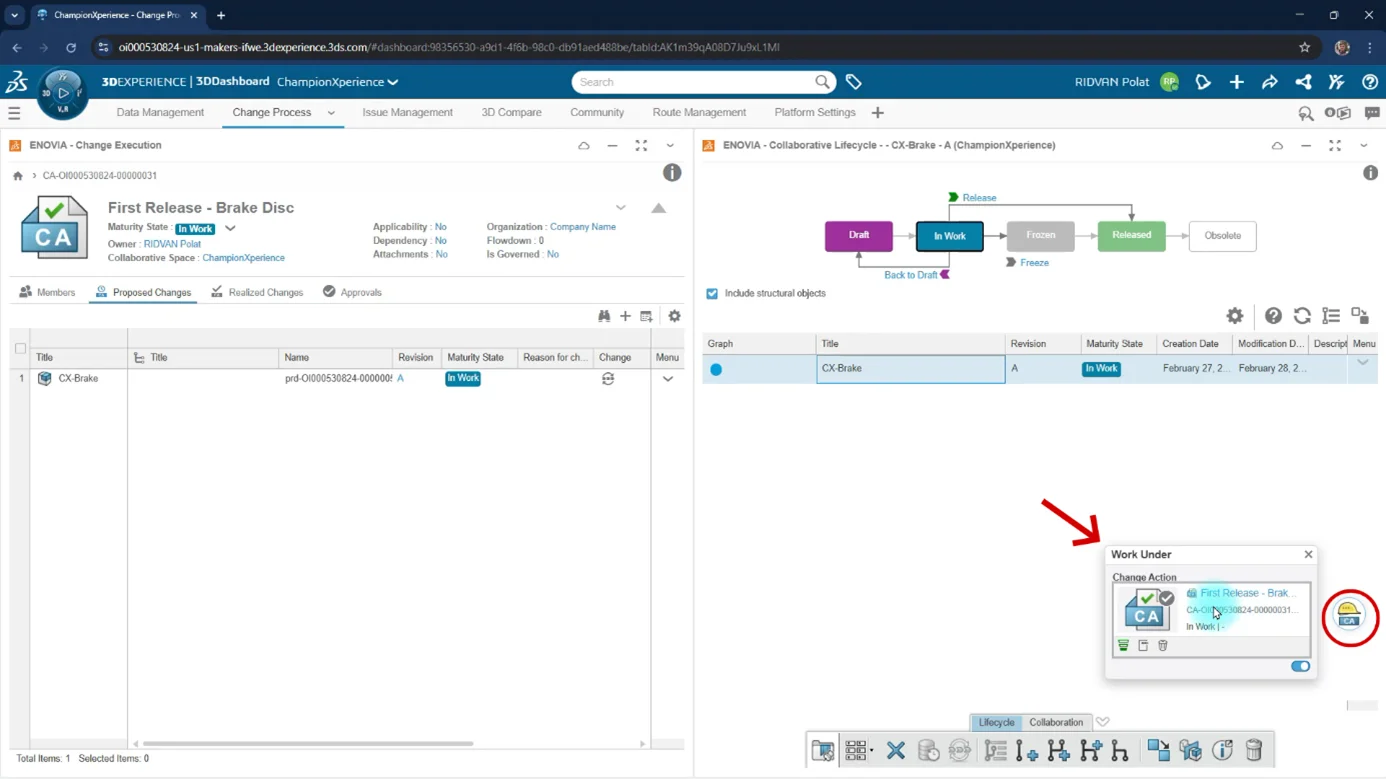
You can see the Work Under feature in many applications. For example, you can see it in the 3DEXPERIENCE window in SOLIDWORKS and in the Collaborative Lifecycle widget.
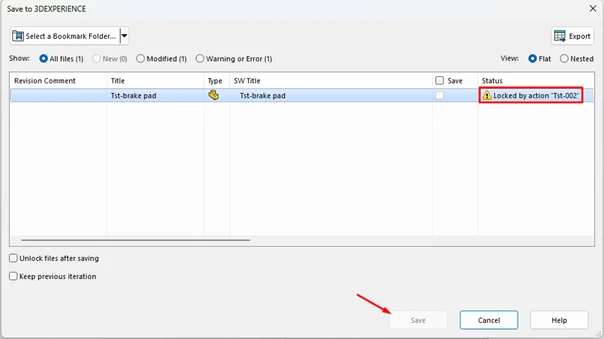
If you do not connect the CA to Work Under after adding a component to the CA, the system will not allow you to save the changes you make on the component. Thanks to this feature, it prevents uncontrolled changes. The warning in the picture saying Locked by action “Tst-002” gives the user this information: This component is connected to a CA named Tst-002. If you do not perform your operations using Work Under, you cannot Save.
When you connect the CA to Work Under, you can see that the Save button is both active and has the Active Work Under icon next to it.

Maturity State
With Maturity State, it is decided what state the CA is in. We can say it is a way to trigger the CA.
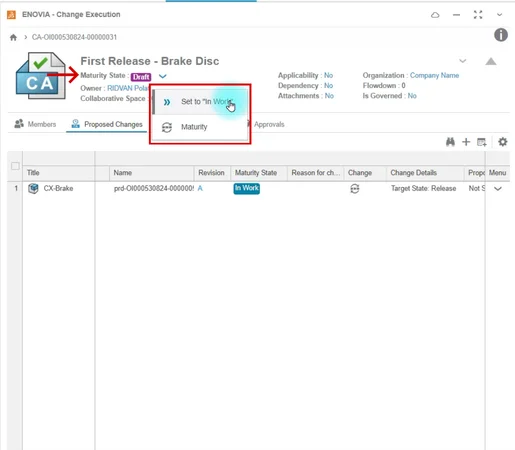
When you first create the CA, it is in the Draft maturity state. This means only you can see this CA. When you promote it to the next maturity, In Work, a notification goes to the people you added to the Members tab, and the CA process begins. When the member assigned to the CA completes the necessary work, they promote it to the In Approval maturity state to submit it for approval to their manager and the relevant unit. As a result of the relevant person or the people in the route giving approval, it rises to the Approved maturity, and from there directly and automatically to Completed, completing the CA process

Approvals
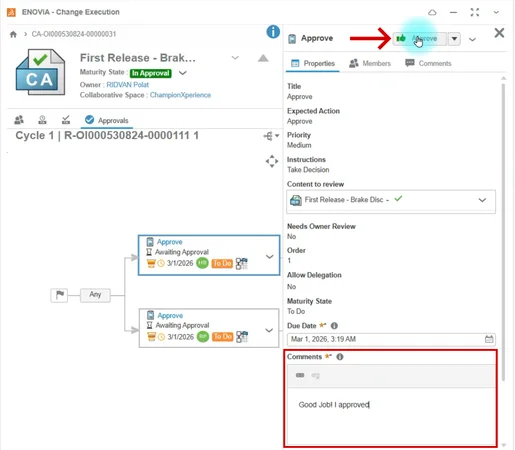
This tab allows the execution of approval processes. Approval can be given by a single team member or by adding a route. If a route is added, the process will proceed according to the route’s flow. To approve, make a Comment and select the green Approve icon, as shown in the picture. You can also see the Reject option by selecting the down-facing arrow right next to the Approve icon.
Collaborative Lifecycle
The most fundamental application of PLM, ENOVIA Collaborative Lifecycle, enables you to control the product’s lifecycle. It has both web and desktop applications. Through the application, you can manage the component’s maturity state, revisions and perform many other operations.
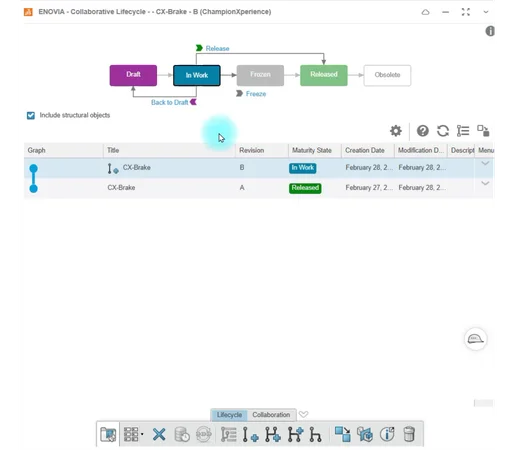
The interface and basic concepts you will encounter when you want to use the Collaborative Lifecycle widget are as follows.
Maturity State
Many applications on the platform have their own Maturity State, and workflows may differ from each other. For example, the Maturity State of a CA and the Maturity State of Lifecycle differ. This is entirely intentional for how each is used. The maturity state here acts directly on an object. For example, it shows the status of a part or assembly in SOLIDWORKS.
Lifecycle
There are many commands in the Lifecycle tab located on the Action Bar. With these commands, you can perform operations like Revision and Branch.

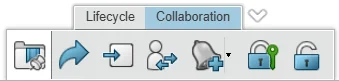
Collaboration
Through the Collaboration tab, you can change the Owner of the Data and perform Lock and unlock operations.
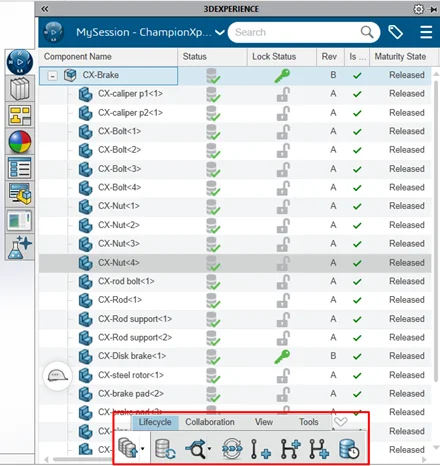
Also, you can see some commands located in the Action Bar in the 3DEXPERIENCE Window in SOLIDWORKS. In this way, you can perform many operations like changing Maturity status and creating Revisions directly via SOLIDWORKS without going to the browser screen.
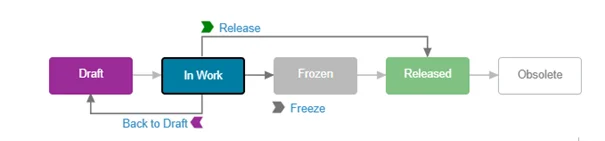
If we proceed through SOLIDWORKS
When you create a new part, the initial maturity in its lifecycle is usually In Work. In the In Work state, you can make changes on your part and save it.
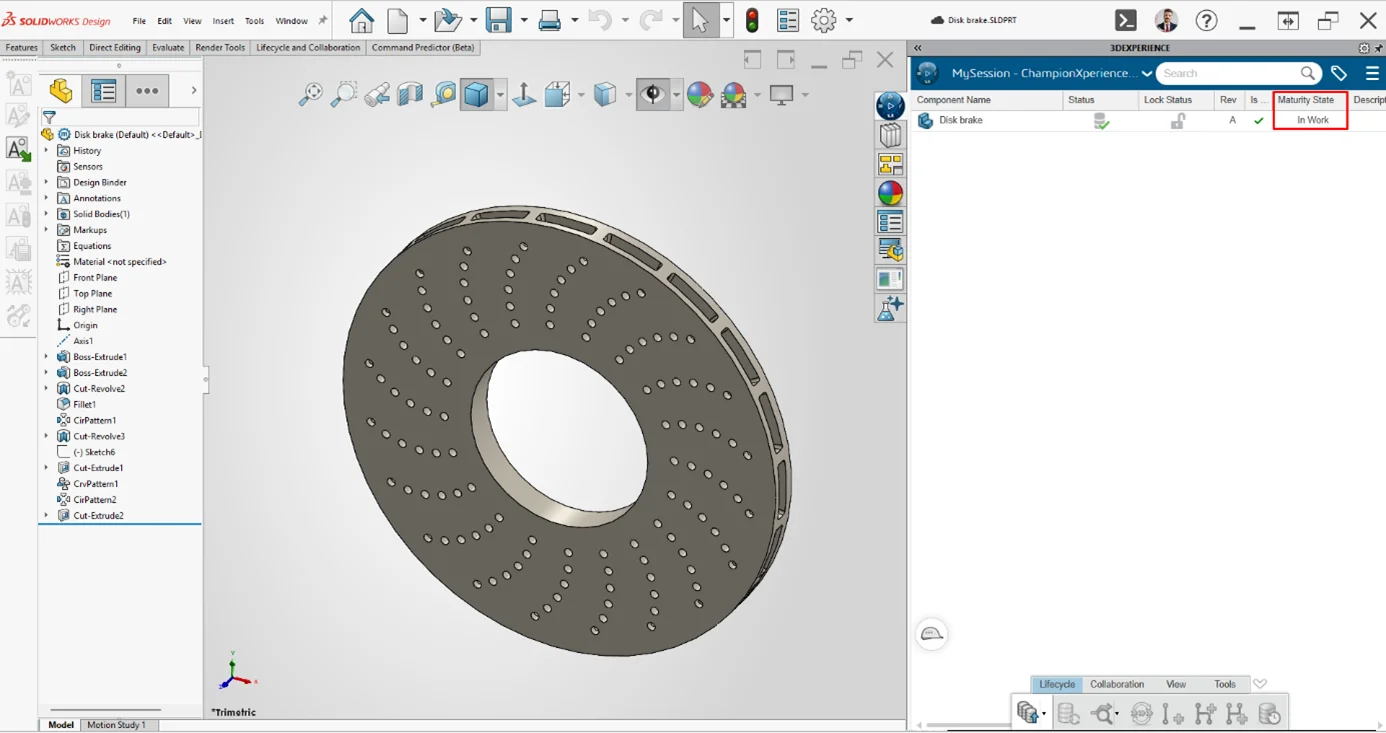
When you set the Maturity state to Frozen, you cannot perform any operations on the part; it becomes read-only. This is preferred when the design needs to be reviewed.
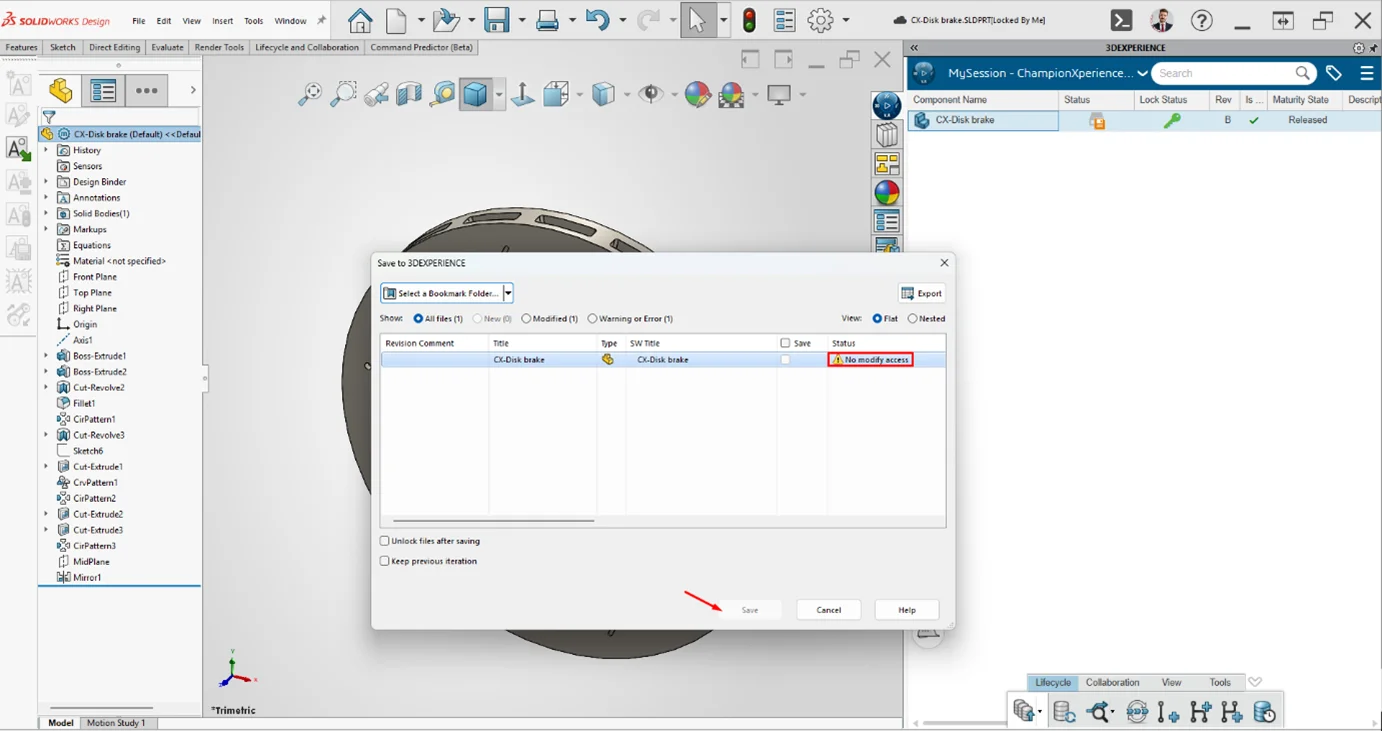
When you set the Maturity state to Released, it indicates that your part/assembly is now approved and ready for production. Now, even if a change is made to the data, it will not be allowed to be saved. Trying to save brings up the use of revision.
|
|
 |小黑屋|手机版|Archiver|机械荟萃山庄
( 辽ICP备16011317号-1 )
|小黑屋|手机版|Archiver|机械荟萃山庄
( 辽ICP备16011317号-1 )


 发表于
发表于